
Welcome to CiviMesh
Projects, liner samples and laboratory evidence in one connected workflow.
Sewer-lining project collaboration
From work on site to signed laboratory results.
CiviMesh connects the project, the installed liner, its samples and the laboratory work behind each result. Project teams and laboratories work in the same context, with clear responsibilities and a history that stays attached to the work.
Organise a project into parts, record the sample and its material configuration, request the right tests, then follow every form through to laboratory signing.
Sign in and select your organisation to work with the projects and laboratory resources available to you.
Find your workspace
The context you need, where you work.
Projects & samples
Keep project ownership, location and participating organisations together. Break work into project parts with street and endpoint references, then record samples and their revisions.
Go to projectsLaboratory work
Open the request queue, inspect the sample context and complete the assigned forms. Review measurements and acceptance checks before signing and sending the request back.
Open the lab queueDIBt & suppliers
Browse approval documents, their revisions and technical liner configurations. Samples reference the selected configuration so laboratory work uses the relevant material context.
Explore DIBt approvalsTests & form design
Define reusable forms, requester inputs and acceptance rules. Combine forms into tests and choose who may fill them, while existing requests retain their published definitions.
Open the test creatorHow the work moves
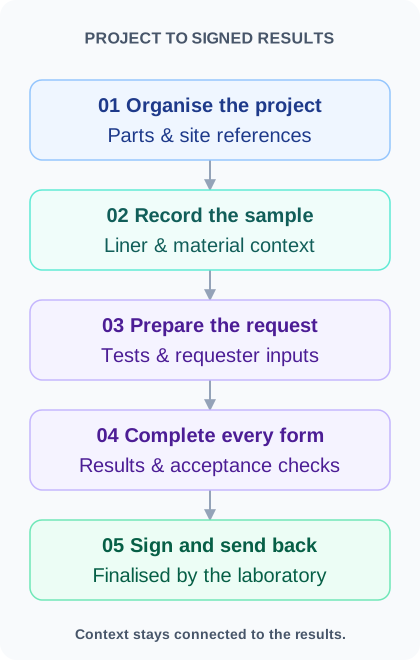
Five steps to a complete record.
Give the work a place
Create a project, set its owner and laboratory, and add the project parts that describe the work. Location and sewer-node references connect each part to its physical context.
Describe the sample
Record the installation and collection details, liner dimensions and resin, and select the applicable DIBt configuration. Use a new sample revision when the recorded context changes.
Prepare the request
Select published tests and complete their requester inputs. Review the configuration before sending it to the laboratory; starting execution locks that configuration.
Complete the laboratory forms
The laboratory submits a result for every assigned form. Typed fields and units support consistent measurements, while acceptance rules compare the results with the request's recorded criteria.
Sign and send back
Once all forms and evaluations are complete, an authorised signer in the laboratory signs the entire request and immediately sends it back as completed. The signed results become read-only.
Start with your part of the work.
Project teams prepare the context and request. Laboratories record and sign the results. Access follows your organisation and assigned permissions.